Inserting and Editing an Image
It's easy to add images to your web pages, and Modern Campus CMS also includes a built-in image editor so you can resize, crop and make basic edits to your images.
A note about image sizes:
If you're placing an image on an interior page (not your home page hero image), remember that you want to save the image large enough to use without being too big. So a good rule of thumb would be for horizontal images, set the width for 1200 pixels, and vertical images should have a maximum width of 800 pixels. You can always resize the image on the page to smaller dimensions. Image resolution for the web is 72 dpi (pixels/dots per inch).
Home page hero images have their own set of requirements.
Check out our Style Guide for more image tips.
There are several ways to insert an image onto a page:
- Click the insert/edit image button on the toolbar while editing a page
- Drag an image from the gadget sidebar
- Upload a new image from your desktop
- Upload and edit a new image using the image editor
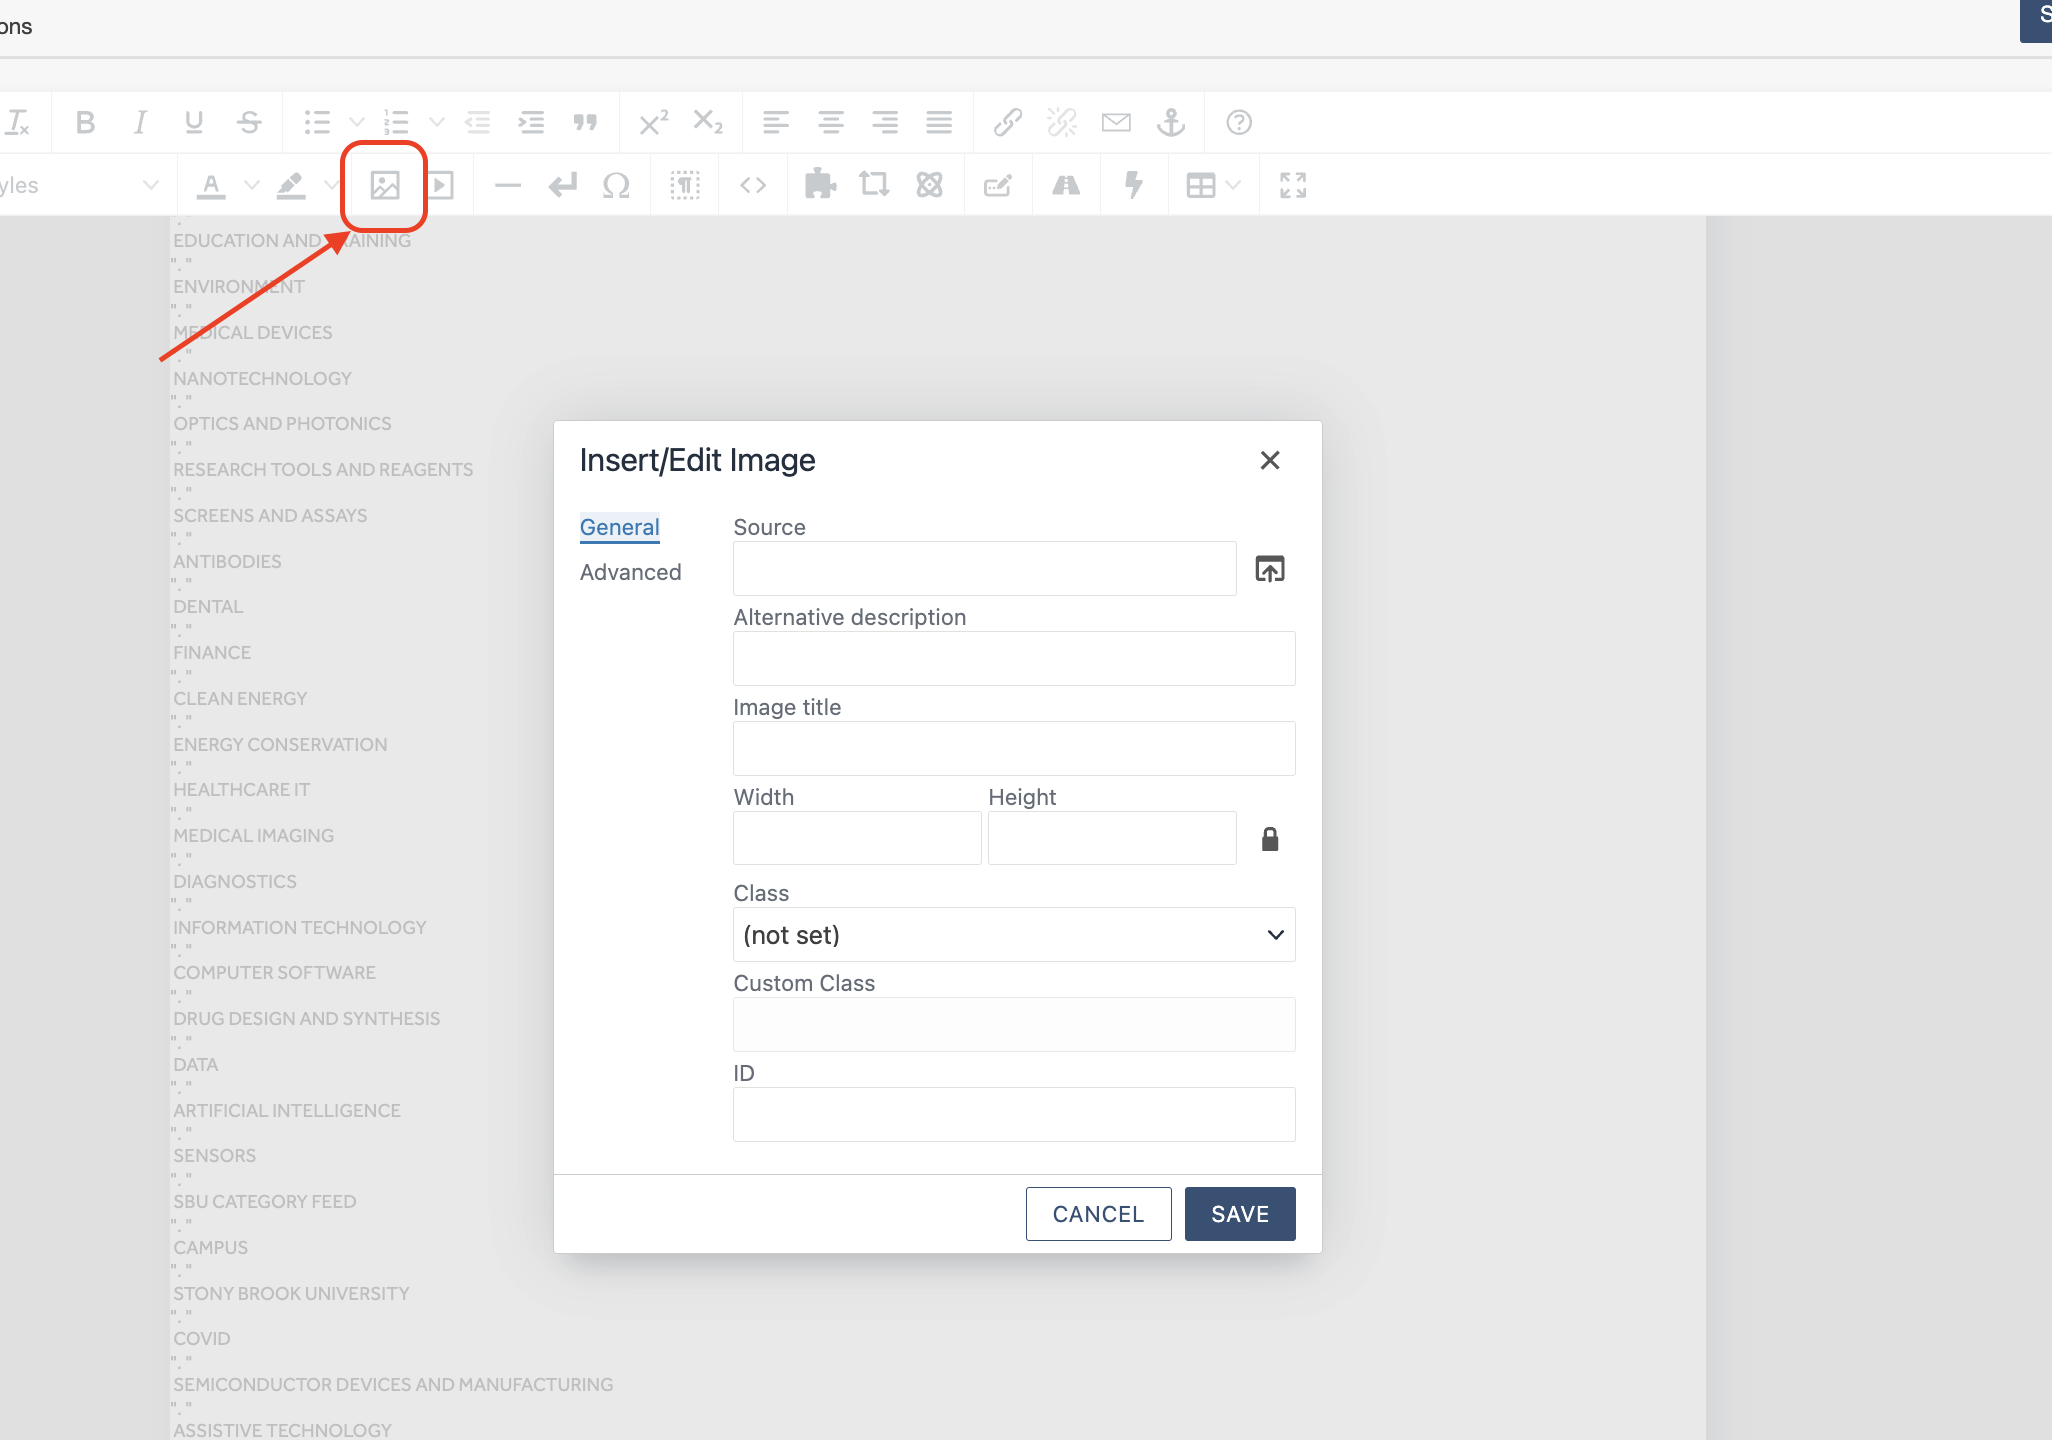
1. Place the cursor onto the spot where you want to place the image on the page and click the insert/edit image button on the toolbar.

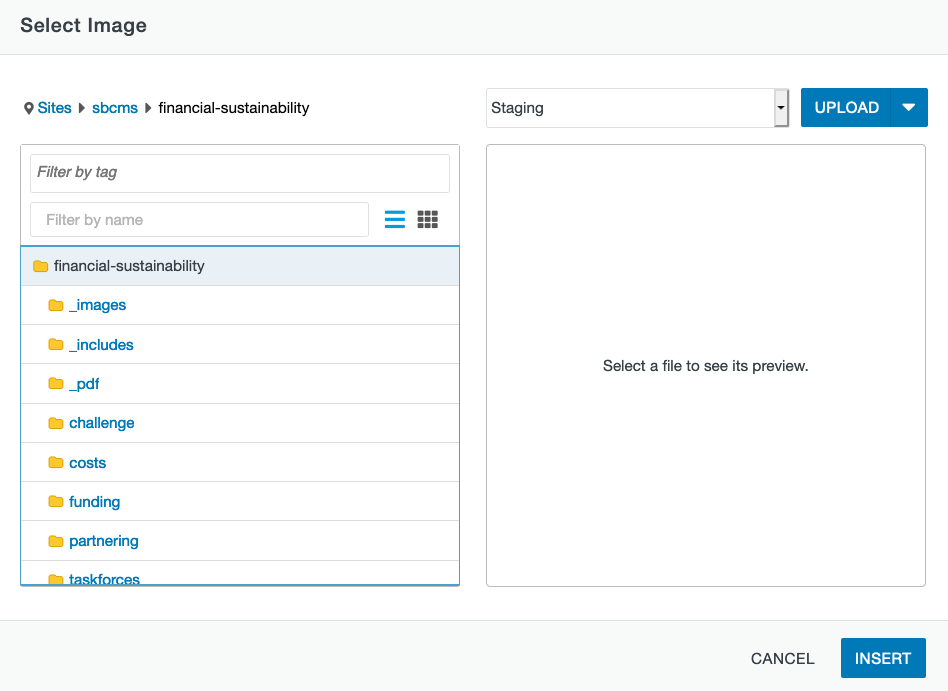
FIRST, Enter a short description in the description field (this is required) and then click the browse icon next to the 'Source' field to navigate to the images folder where the image file resides, so you can select the image to insert. This will be either the main _images folder on your website, or an _images subfolder within a content section.
If you are working in a snippet that supports images, you may find a placeholder image that you will need to replace with an image of your own. In this case, delete the path of the placeholder image from the 'Source' field FIRST, then browse to your images folder. If you do not delete the image path and click browse, the system will take you to the images folder where the placeholder image resides, which is not in your site folder.
Once you have found the image you want to place on the page, click INSERT.
 NOTE: To the left of the upload button is a dropdown that says' Staging' and if you click
on it, a second option appears called 'Production.'
It is recommended that you leave the selection to the default of 'Staging' as the image will upload to the images folder on the staging sever, which has 2 advantages:
- The image will be assigned a dependency tag or identifying number, which will stick with the image in case it ever moves to another folder or if the images folder is moved (and therefore the image path will not break). When the page is published, the image is published along with it to the production server, meaning the image will exist on both servers. So if something ever happened to the production server, you can simply republish the whole site from staging and all pages and images will be republished.
While you are still in the edit/insert image window, adjust the width of the image if necessary by entering a new width in pixels. Tabbing over to the next field will automatically adjust the height of the image if the 'constrain proportions' box is checked, which it is by default.
You can then click the 'Appearance' tab to align the image either to the left or right, among other options (although left or right are most common). You can also add vertical or horizontal space (in pixels) around the image so that when text wraps around the image, there is some breathing room (for example, 3 pixels of vertical adds that space at the top and bottom of the image, 12 pixels horizontal adds that space to the left and right of the image). Advanced appearance options are also available.
Click OK and the image will be placed onto the page. To edit the image further, just click the image to select it and then click the insert image icon again to adjust your settings. You can also click on the image and drag the borders of the image to quickly resize it.
2. Another way to add an image onto a page is to drag and drop images from theIMAGES GADGET in the gadgets sidebar. With the gadgets sidebar open, open the Images section, and then scroll to the images folder and image that you want placed onto the page. Drag that image onto the page, and then the 'place image' dialog box will open so you can add a description and adjust the appearance accordingly. Follow the remaining steps from option 1, above.
3. You can upload a new image while working on the page by following the directions in option one, but instead of selecting an existing image from the images folder, click 'Upload.' You can then drag an image from your desktop into the dialog box and click 'Start Upload.' When it has uploaded, select the image file name and follow the steps above.
NOTE: You should only do this if you have already edited and saved a web-optimized image on your desktop, either by using photo editing software like Photoshop, or a web-based online editor like Pixlr.
4. You can Upload and Edit an image at the same time by selecting 'Upload and Edit' from the Upload dropdown instead of simply clicking 'Upload.' This will open the image in the built-in image editor, and here you may crop, resize and do other basic editing.
Learn more about the image editor HERE.
Once the image is on the page, when you SAVE the page you will notice that you will
not see the newly placed image when the page preview appears. DON'T PANIC!
This is because the page (and the image) have not yet been published and are not yet on the production server, which the preview is referencing.
Simply PUBLISH the page, and the image will appear on the live site/production server. If you go back to edit the page again and save again, now the image will appear in preview, as it has already been published.
You can avoid this potential confusion by uploading images to Production instead of staging, but the image will not receive a dependency tag and will not be backed up on the staging server. It will, however, appear in preview mode as it was uploaded directly to the production server.
External image information
It's important to have all images from a page be linked from the CMS and not an external website. Here are a few reasons why:
- There is a chance that the website you are linking from will not be secure causing a "Mixed Content" warning on your website
- If the image is moved or deleted you will end up with a broken path
- You have a wider array of editing options when working with an image from the CMS
